
How We Solved Digital Print Distortion in Custom Picnic Mat Production
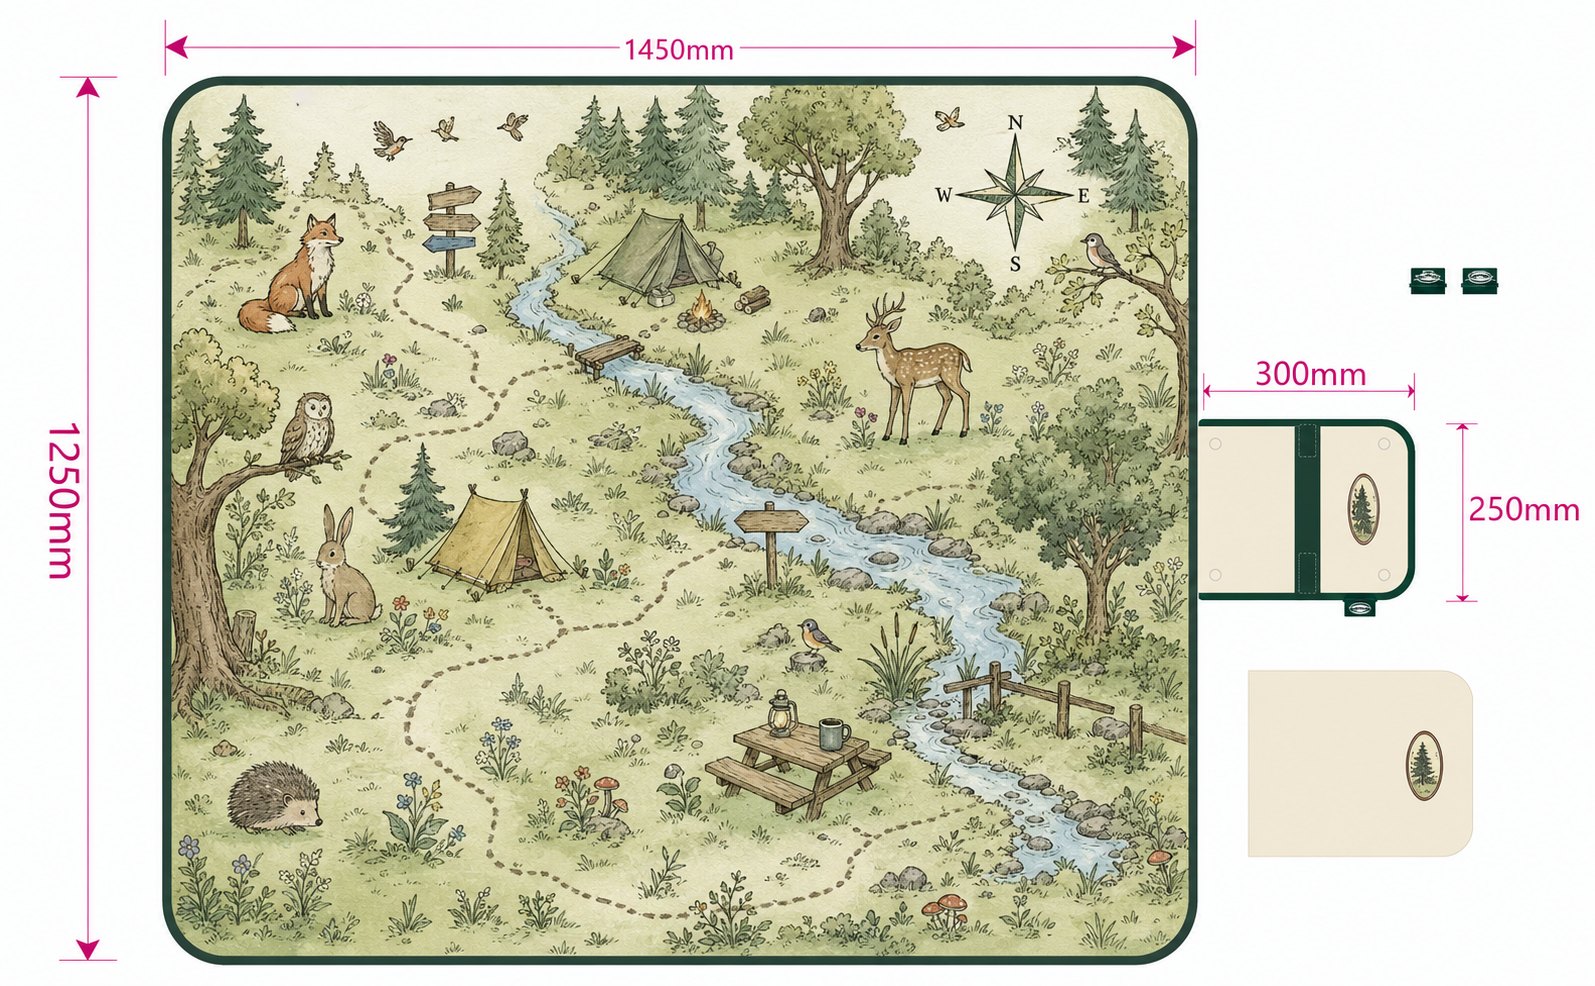
Digital printing can reproduce detailed, full-surface artwork on a custom picnic mat, but the final image may change when the printed fabric is laminated to a PE backing. In this production case, the fabric shrank during digital printing and was then stretched during PE lamination. The combined movement made the finished mat narrower, longer and visibly distorted around the edges.
This custom picnic mat digital printing case shows why artwork dimensions must be based on tested material movement rather than the nominal finished size alone.
Image disclosure: To protect customer information and avoid third-party brand use, the original printed artwork in the case-study images has been replaced with a non-branded woodland design. The dimensional and deformation examples remain representative of the production issue.
After repeated pre-production samples, the team visited the processing factory, measured the material movement and adjusted the artwork before printing. The final working layout was set at 151.5 × 115 cm, with 2 cm of bleed at the top and bottom and 1 cm on the left and right. This compensated for the expected shrinkage and stretching, kept the customer’s artwork inside the required finished area and prevented white edges after laser cutting.
Project Requirements
The product was a digitally printed beach mat made with a soft 4 × 4-64T face fabric and a PE backing. The construction required the printed fabric to be laminated to the PE layer before final cutting and edge finishing.
The customer’s main requirements were:
- a finished printed area of 145 × 125 cm in the initial sample;
- complete artwork with no important details cut away;
- clean, straight edges; and
- a stable finished size after printing, lamination and cutting.
These requirements appeared straightforward at the artwork stage. The difficulty came from the way the soft fabric reacted to two different processes: digital printing and PE lamination.
Buyers planning a similar outdoor product can view Senrong’s custom foldable picnic mat and custom beach and camping mat examples.
What Went Wrong in the Initial Sample?
Problem 1: The Finished Dimensions Were Unstable
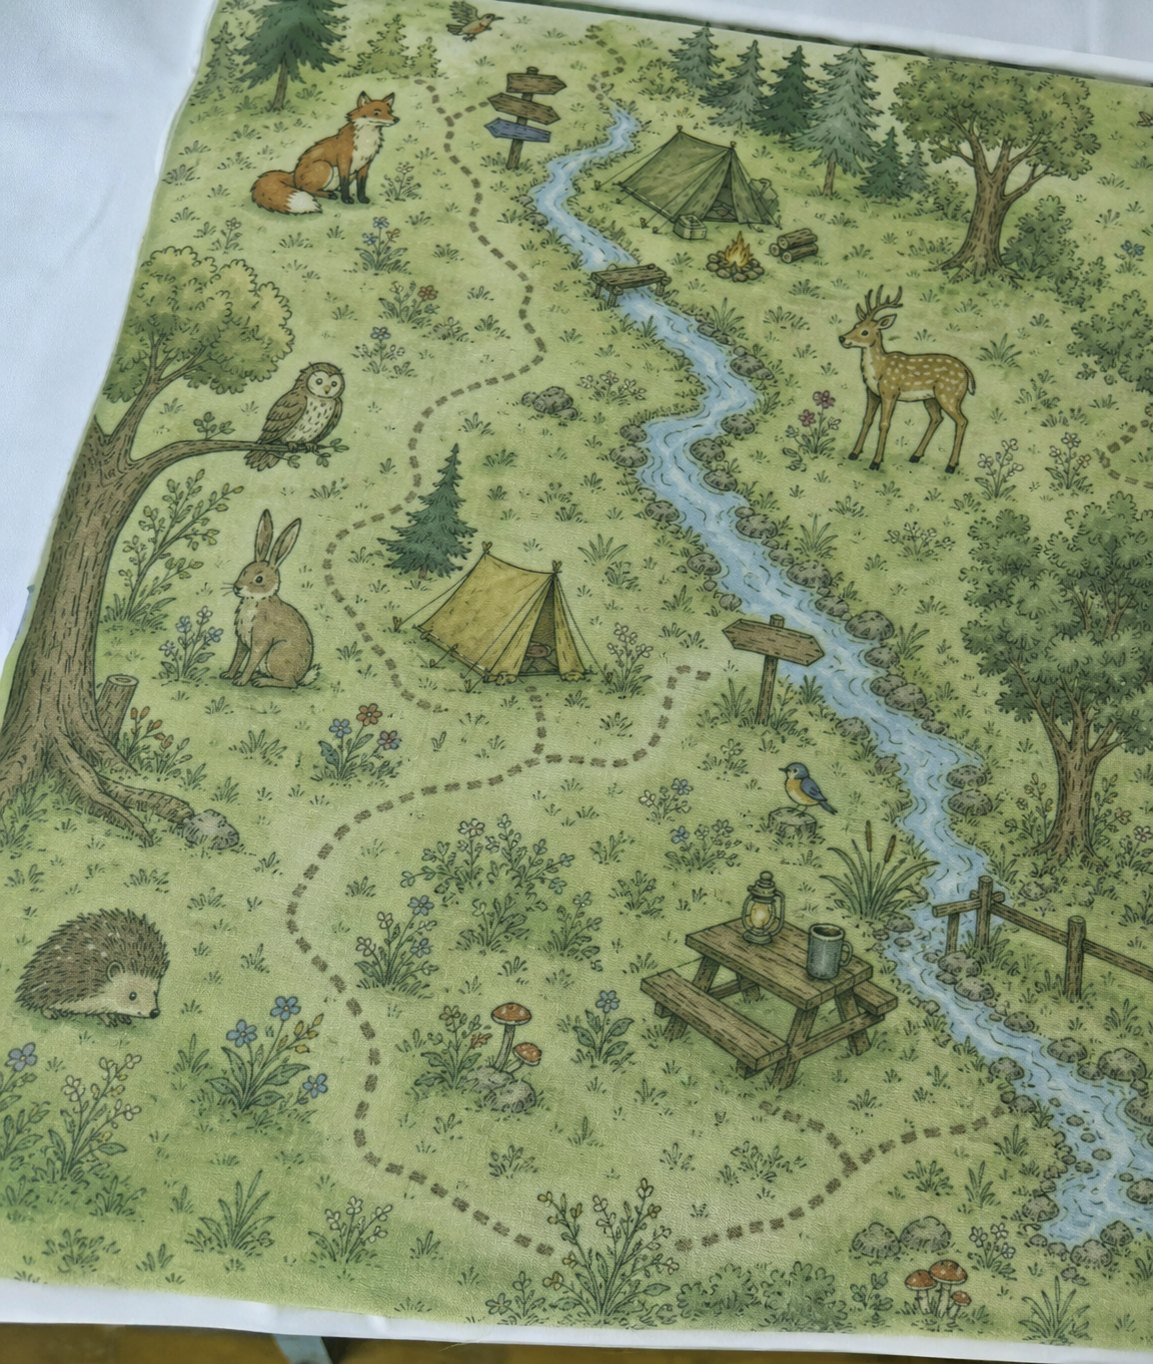
The target width was 145 cm, but the first sample measured only 143 cm. The artwork height was designed at 125 cm, but after the material was stretched during lamination, the measured height reached approximately 135 cm.
The print layout had also not been extended in the 145 cm direction. As a result, there was not enough printed allowance to compensate for the reduction in usable width.
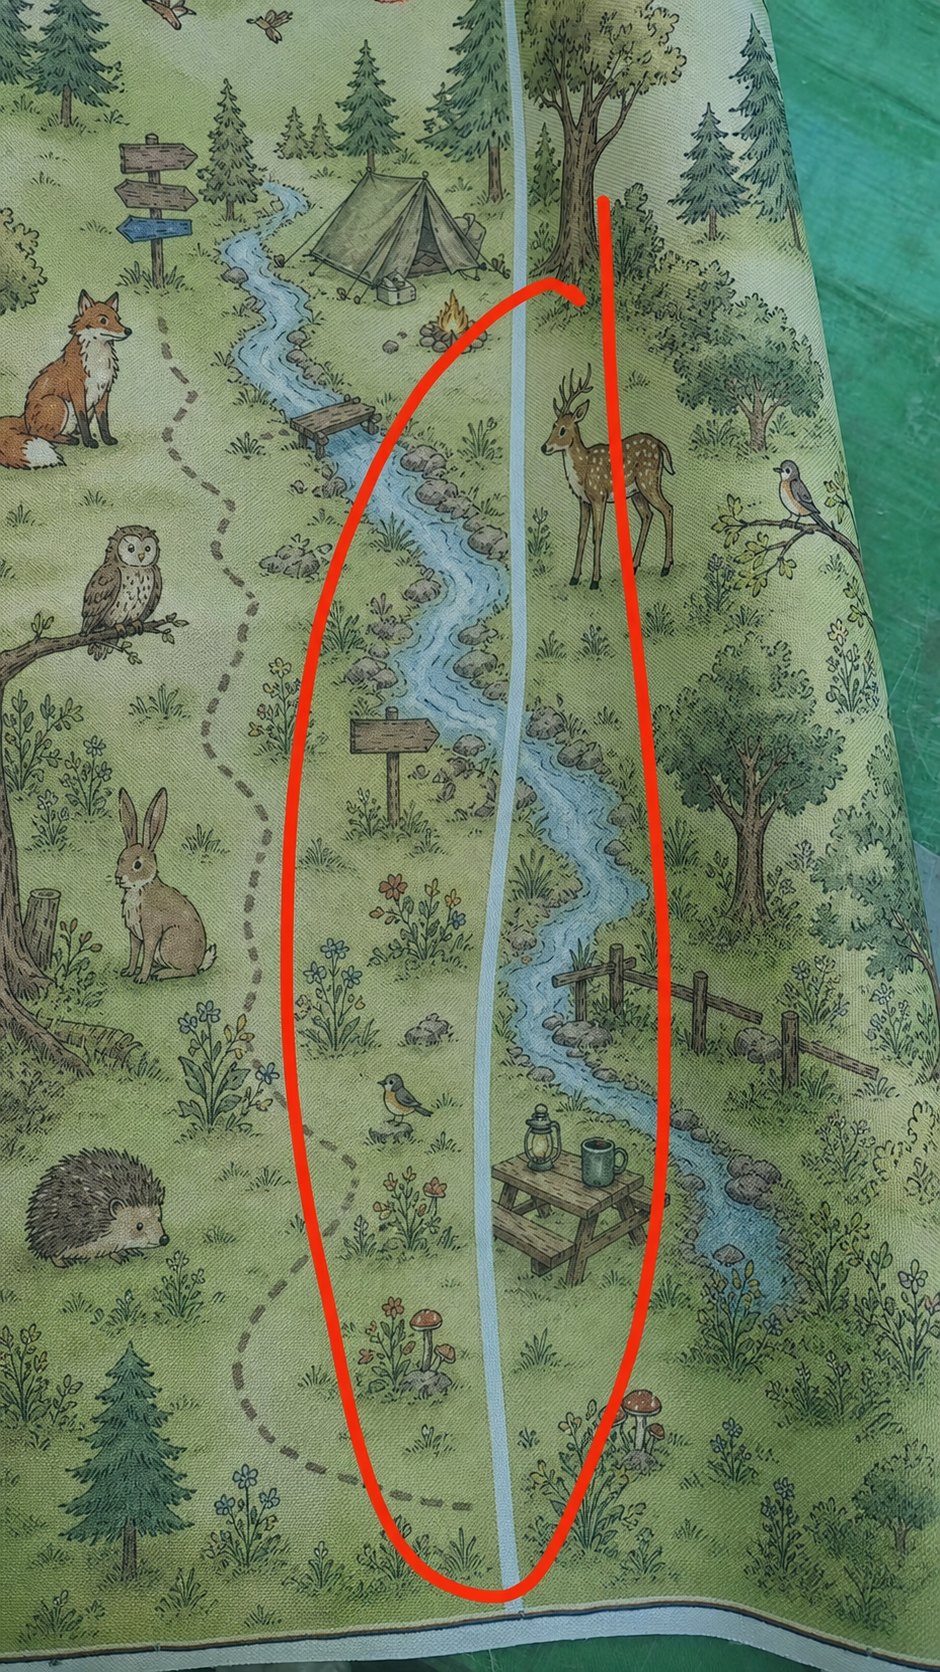
Problem 2: The Artwork and Edges Became Distorted
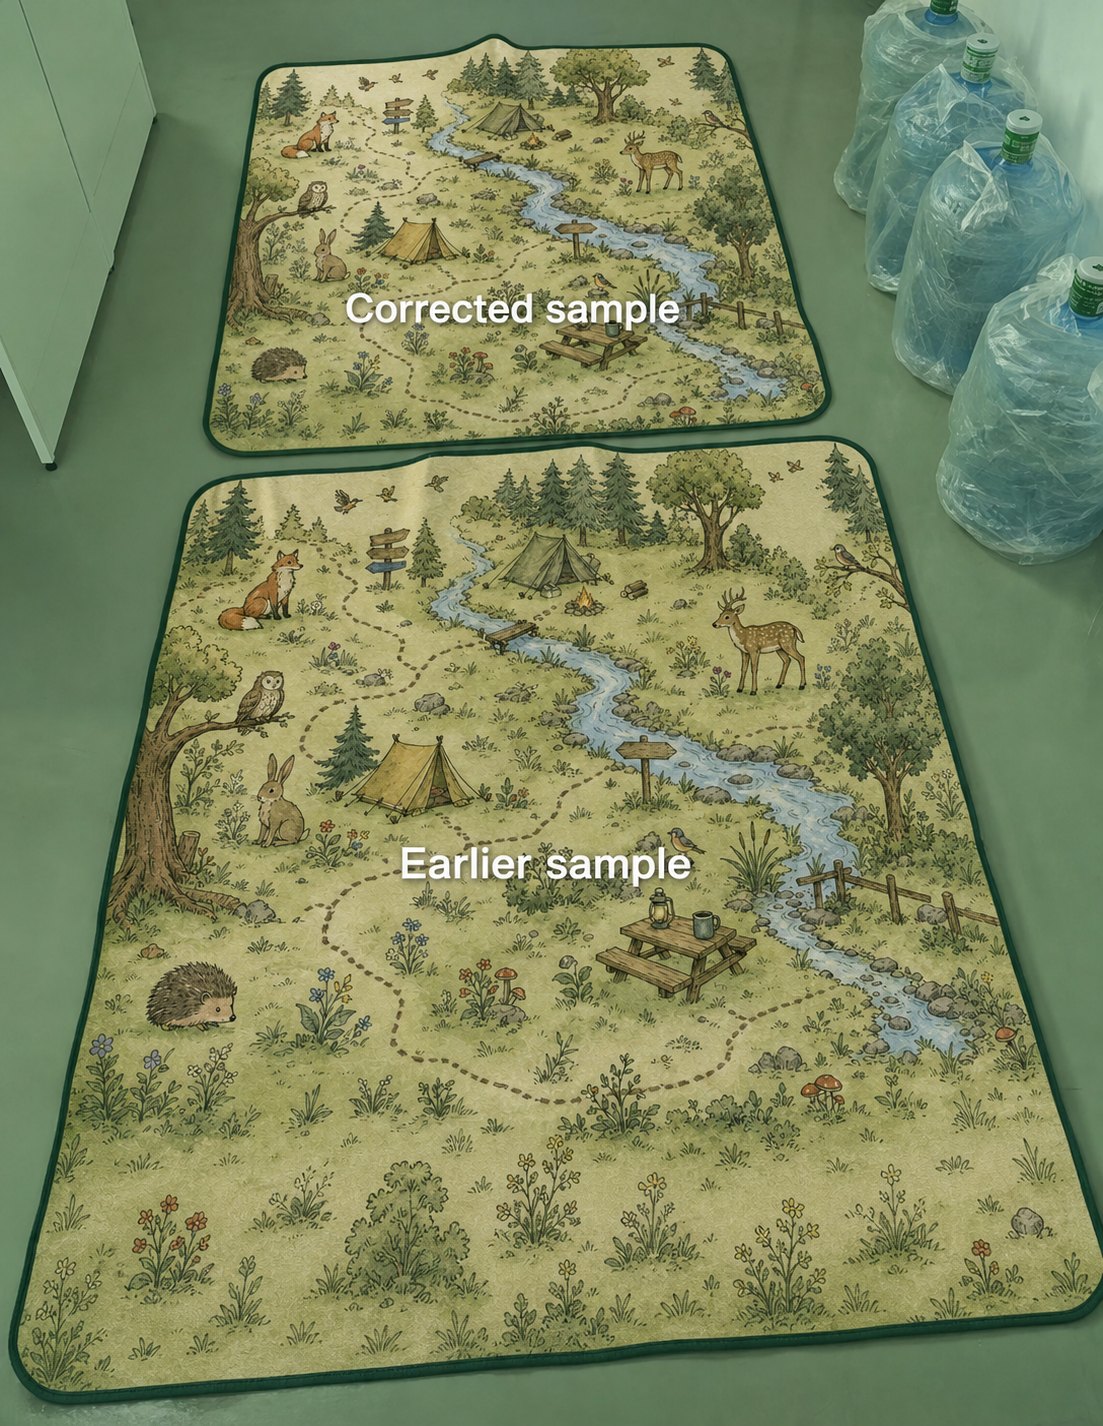
The edges were pulled into a curved shape during lamination. Some parts of the customer’s artwork moved outside the cutting area and were removed during trimming. The finished mat therefore showed two connected defects: the overall dimensions were incorrect, and the printed design was incomplete.
Why Did Digital Printing and PE Lamination Cause Distortion?
The issue was not caused by a single operation. It came from the interaction of the material and the complete production sequence:
- The 4 × 4-64T base fabric was relatively soft. A softer construction is more easily stretched or pulled during processing.
- The fabric shrank during digital printing. This reduced the width available for the final product.
- The fabric was stretched during PE lamination. The lamination process pulled the material in the length direction.
- The two movements worked in different directions. The width became smaller while the length became greater, changing both the finished dimensions and the appearance of the artwork.
In practical terms, the printing process made the material contract, while the lamination process pulled it longer. If the artwork is prepared only according to the nominal finished dimensions, it cannot reliably compensate for both changes.
Why the First Corrective Attempts Were Not Enough
The material supplier proposed using a harder, more stable fabric and increasing the new material width to 157 cm. The customer also changed the required artwork size from 145 × 125 cm to 145 × 120 cm.
However, the first pre-production sample still did not have enough width, and the height was stretched too far. A second sample made with the harder fabric also showed dimensional deviation and curved edges.
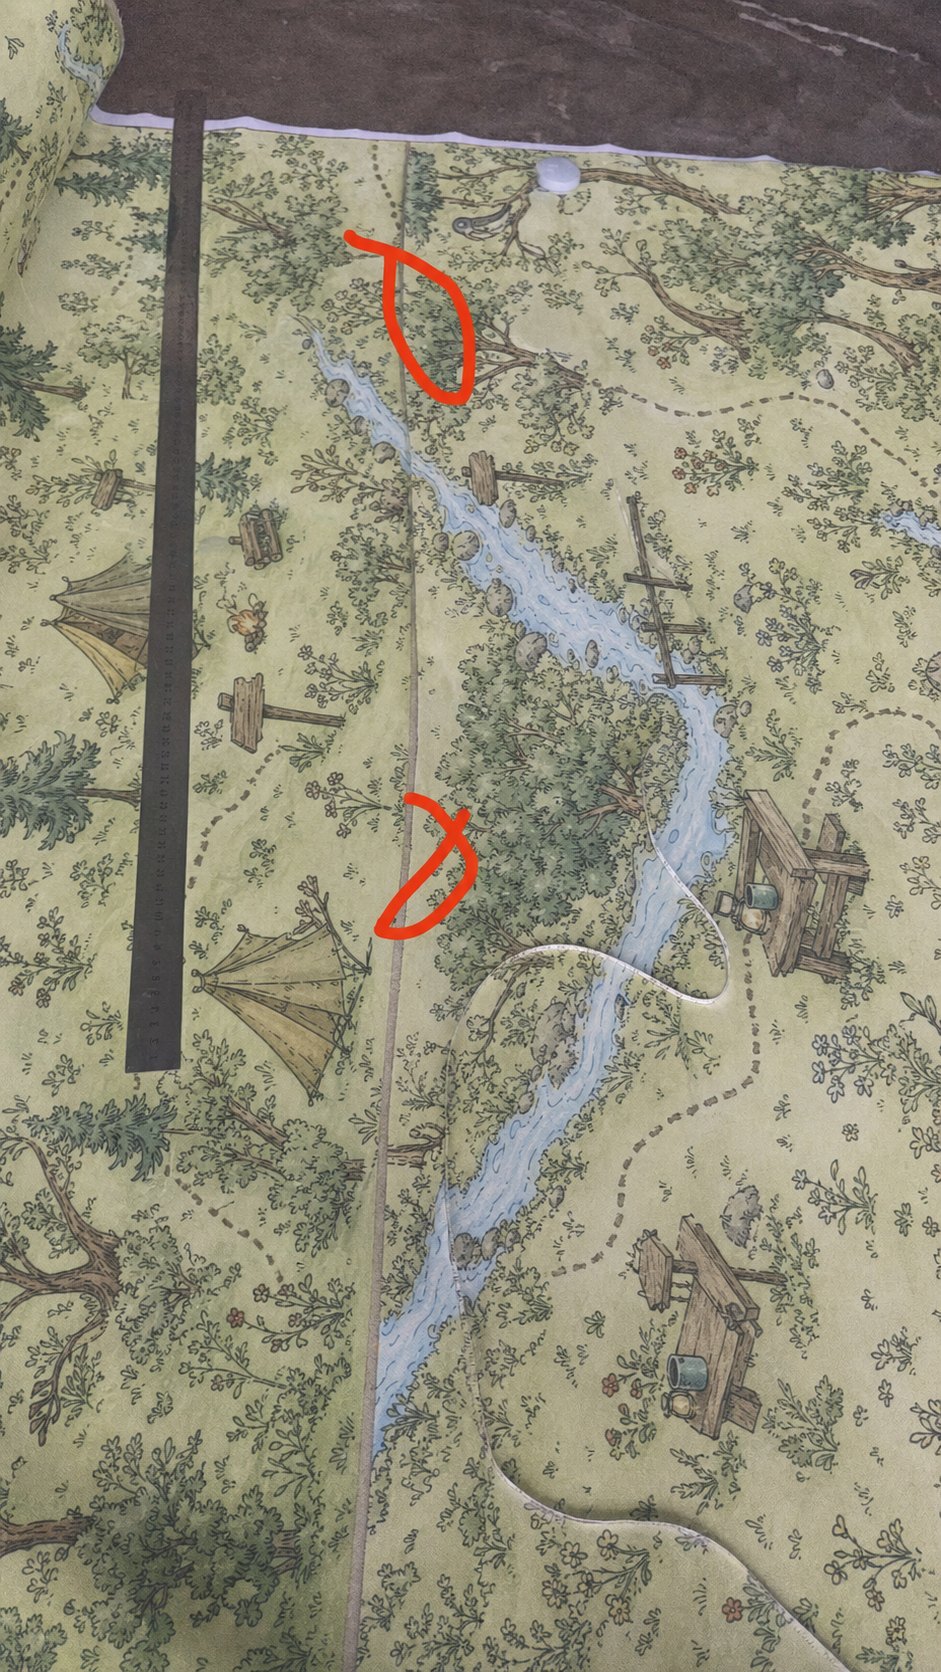
This showed that changing the fabric alone was not sufficient. The printing layout also had to be adjusted according to the measured shrinkage and elongation of the complete printed-and-laminated structure.
On-Site Root-Cause Review
Because the delivery schedule was tight, the team went directly to the processing factory and reviewed the issue with the printing technician. The direction of material movement was checked step by step:
Digital printing → fabric shrinkage
PE lamination → fabric stretching
Combined result → reduced width, increased length and distorted edges
This on-site review turned a general “size problem” into measurable production data. Instead of continuing to make samples with the same nominal artwork dimensions, the team created an intentional pre-print compensation layout.
The Final Print Compensation and Bleed Plan
The final artwork was adjusted before printing as follows:
- Pre-print artwork size: 151.5 × 115 cm
- Top bleed: 2 cm
- Bottom bleed: 2 cm
- Left bleed: 1 cm
- Right bleed: 1 cm
The wider pre-print layout compensated for shrinkage in the width direction. The shorter artwork height compensated for elongation during PE lamination. The added bleed created a safe cutting allowance around the design.
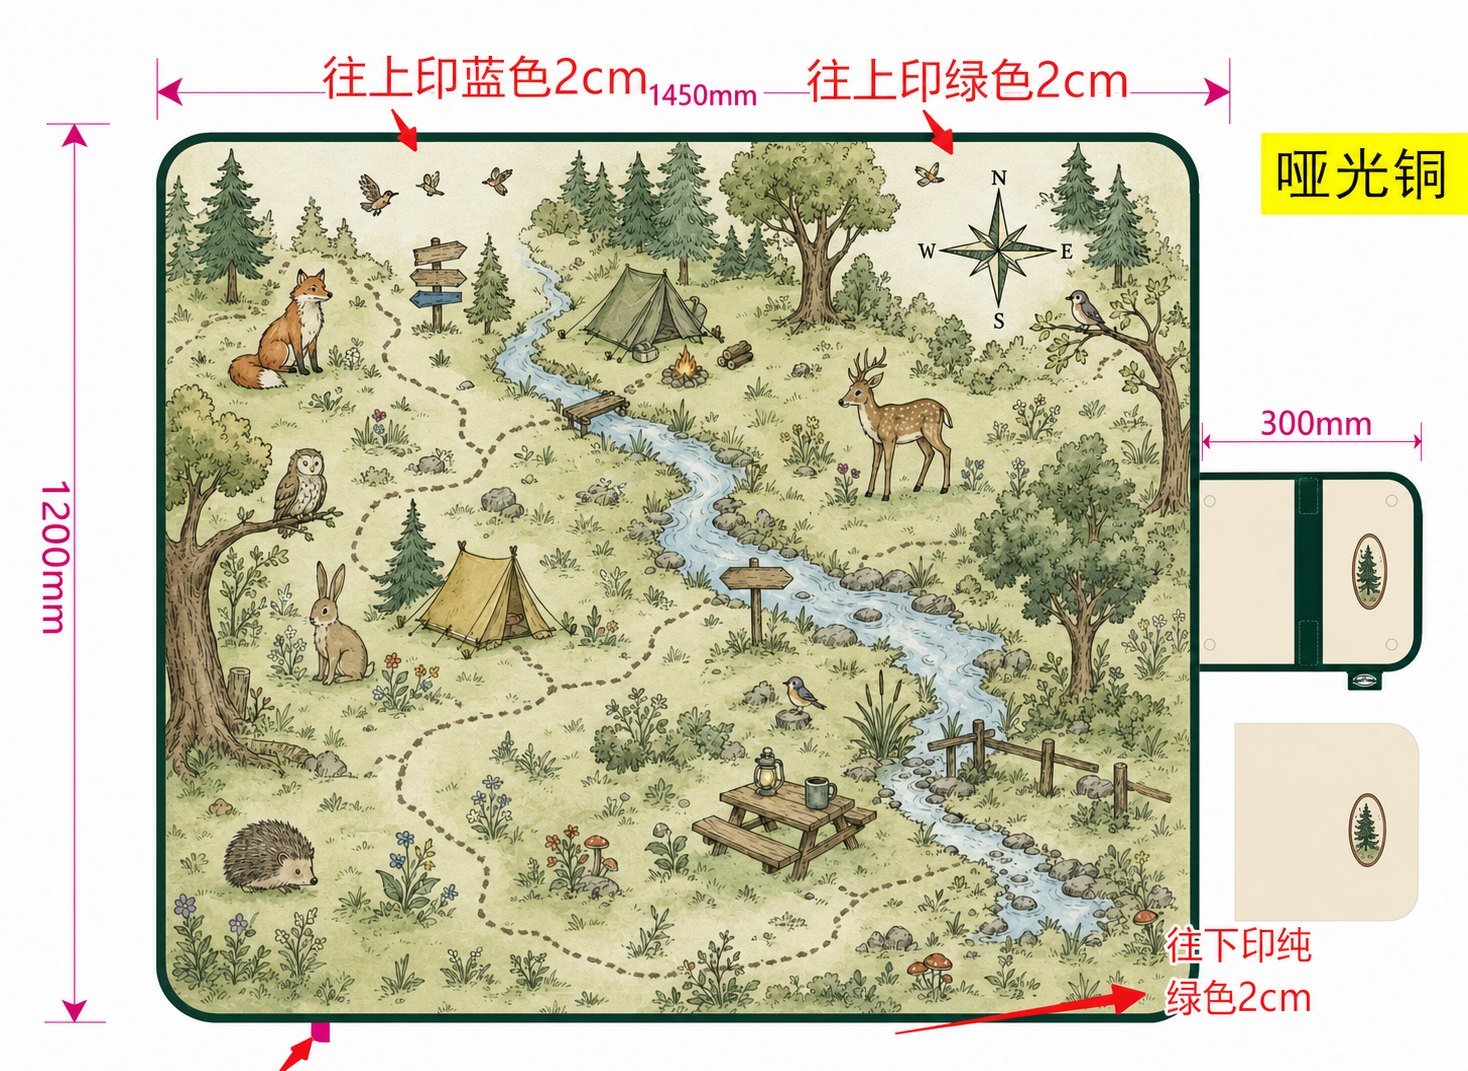
The exact compensation values in this case should not be treated as a universal formula. Different fabrics, coatings, print settings, lamination temperatures, tensions and mat dimensions can produce different shrinkage and elongation rates. A production team should calculate compensation from tests made with the actual material combination.
Final Production Result
The adjusted plan produced a successful result:
- the artwork remained substantially inside the customer’s required finished area;
- laser cutting did not leave visible white edges;
- the important parts of the customer’s design were preserved; and
- the team could proceed with bulk production despite the tight schedule.
A similar example of production problem solving can be found in Senrong’s custom mouse pad manufacturing case study.
Five Lessons for Custom Picnic Mat Buyers
1. Choose Material Stability Before Bulk Production
When the budget and product design allow it, select a firmer and more dimensionally stable face fabric. A stable material can reduce the risk of excessive stretching during lamination, although the full material structure still needs testing.
2. Request Process Data Before Finalizing the Artwork
Before sampling, ask the printing and lamination suppliers for the fabric shrinkage rate and the elongation rate after PE lamination. These figures help the designer determine the correct print direction, compensation and bleed.
3. Test the Complete Material Structure
Testing the printed fabric alone is not enough. The critical measurement should be taken after printing and PE lamination because the second process may reverse or increase part of the dimensional change.
4. Keep Important Artwork Away from the Cutting Line
Logos, text, characters and other essential design elements should remain inside a defined safe area. Bleed can protect the outer edge, but it cannot restore important artwork that has moved beyond the cutting line.
5. Approve a Measured Pre-Production Sample
Record the dimensions before printing, after printing, after lamination and after cutting. An approved sample should confirm both the physical size and the visual position of the artwork before bulk production begins.
Senrong’s OEM and ODM service process, quality-control approach and factory information provide more background for custom development projects.
Frequently Asked Questions
Why can digital printing change the size of a picnic mat?
Printed fabric may shrink during digital-print processing. If the fabric is then laminated to PE under tension, it may stretch in another direction. The finished dimensions depend on the combined effect of both processes.
Can harder fabric completely prevent print distortion?
A firmer fabric can improve dimensional stability, but it does not automatically eliminate shrinkage or lamination tension. The actual fabric, print process and backing structure should still be tested together.
How should print compensation be calculated?
Measure the actual material before printing, after printing and after lamination. Use those results to adjust the artwork width and height. The 151.5 × 115 cm layout in this case was specific to this material and product.
Why is bleed important for a custom printed picnic mat?
Bleed extends the printed color or artwork beyond the final cutting line. It reduces the risk of visible unprinted edges when the material shifts slightly during lamination or laser cutting.
What information should a buyer provide for sampling?
Provide the finished size, artwork file, safe area, acceptable tolerance, face fabric, backing material, edge construction, folding method, packaging, order quantity and target delivery date. If the artwork contains licensed characters or logos, also confirm the relevant authorization.
Discuss Your Custom Picnic Mat Project
If you are developing a digitally printed beach mat, picnic blanket or PE-backed outdoor mat, send Senrong your finished dimensions, artwork, material requirements and order quantity. The team can review the construction, sampling risks and custom picnic mat digital printing requirements before bulk production.